Can You Use a Vacuum to Clean a PC? Safe Dust Removal Guide
Learn whether it's safe to use a vacuum on a PC, plus safer dust-removal methods, tools, a step-by-step guide, and maintenance tips for a dust-free computer.

Can you use a vacuum to clean pc? The short answer is no for internal components. A standard household vacuum can generate static or damage sensitive electronics. Instead, use gentle external dusting with a soft brush, unplug the PC, and aim compressed air at dust-prone areas from a safe distance. If you must vacuum nearby, choose a low-suction, anti-static attachment and keep it away from the motherboard and power supply.
Why using a vacuum on PC is risky
Cleaning electronics with a standard household vacuum is risky due to static discharge, motor-generated airflow that can push dust further into delicate connectors, and the possibility of drawing debris into vents and cables. According to Vacuum Cleaner Guide analysis, can you use a vacuum to clean pc? The short answer is that internal components should not be vacuumed. Use safer methods like external dusting with a soft brush and compressed air from a distance. In 2026, many reputable sources emphasize avoiding direct suction on boards, GPUs, and power delivery circuits. This section will explain why vacuums aren’t electronics-friendly and what safer options homeowners and pet owners can adopt.
Safer alternatives to vacuuming a PC
There are several approaches that remove dust effectively without risking static damage or component misalignment. Start with high-quality microfiber cloths, soft brushes, and a can of compressed air for hard-to-reach areas. Anti-static considerations are essential: never touch exposed circuitry with bare hands, and ground yourself before handling the case. Vacuuming is only considered around the exterior and cables, never across the motherboard or power supply. By sticking to exterior cleaning and controlled air bursts, you minimize risk while keeping your system clean.
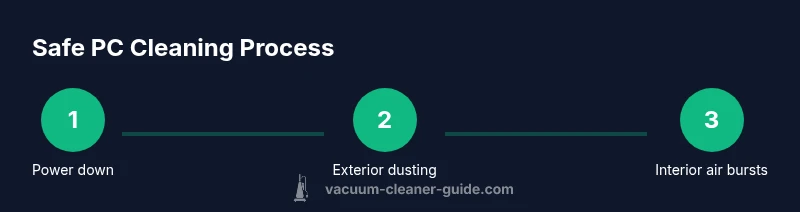
Step-by-step: prepare your workspace and power down
- Power down the PC and unplug all cables. 2) Ground yourself by touching a metal surface or wearing an anti-static strap. 3) Move to a clean, dust-free workspace. 4) Gather tools and confirm you have anti-static attachments. 5) Open the case panel carefully and identify dust hotspots. The rationale is to minimize static buildup and prevent accidental contact with sensitive components. This foundational step sets the stage for safe cleaning in 2026.
Cleaning exterior surfaces and accessible interior parts with safe tools
Use a soft brush, microfiber cloth, and a low-suction approach to remove dust from the outside surfaces, fan grilles, and accessible interior areas. Never swirl a vacuum around interior components. Instead, gently loosen dust with the brush, then wipe with microfiber. The aim is to reduce loose dust without forcing debris into connectors. If you must use a vacuum near the case, keep a distance and use a narrow nozzle with minimal suction to avoid suctioning delicate parts. This approach protects airflow paths and prevents accidental contact with fans and slots.
Using compressed air safely for interior dust removal
Compressed air is the preferred method for interior dust removal when you cannot access dust with brushes alone. Use short bursts from a distance of 6-12 inches, keeping the can upright to avoid condensation. Always aim away from fans, not into them, and never spray while the system is powered. Allow the PC to rest and settle dust between bursts. This technique aligns with best-practice guidelines and reduces static risk while keeping components intact.
Reassembly and post-clean checks
Carefully reattach the side panel, reconnect cables, and power on to verify system stability. Check CPU fans, GPU fans, and dust filters for residual debris. If you still notice dust in hard-to-reach areas, repeat the external cleaning routine and re-check the vents. Document your process for the next maintenance cycle and note any areas that accumulate dust more quickly.
Creating a maintenance routine to minimize dust buildup
A proactive routine helps you avoid frequent deep cleaning and reduces the temptation to use a vacuum on pc. Schedule a quarterly check and run through this checklist: clean ambient surfaces, replace or clean dust filters, inspect fans, and run a quick performance check. The question can you use a vacuum to clean pc should guide you toward safer methods and prevent unnecessary risk. Regular maintenance keeps temperatures stable and extends component life.
Handling pet hair and dusty environments
Pet hair clogs filters and vents quickly, so set a short, frequent cleaning cadence if you have cats or dogs. Use air purifiers, keep the workspace tidy, and use anti-static tools designed for electronics. In pet-rich homes, a dedicated cleaning schedule helps maintain performance without exposing components to direct vacuuming. This approach reduces the accumulation of hair on intakes and helps maintain airflow.
Final prep: power on, monitor temps, and plan next steps
After reassembly, power on and monitor temperatures for 10-15 minutes to confirm stability. If temps spike or the system behaves oddly, power down and inspect for dust clogs or loose cables. Keep a log of your cleaning activities and adjust future schedule to align with changing dust levels or seasonal conditions. Documentation helps you track what works and when to revisit maintenance.
Tools & Materials
- Anti-static wrist strap(Ground yourself before touching components.)
- Microfiber cloth (lint-free)(Dry cloth for exterior surfaces and accessible interiors.)
- Soft brush (anti-static)(Gently loosen dust without creating static.)
- Compressed air can(Short bursts; keep upright; distance from components.)
- Screwdriver set (Phillips/flathead)(Remove side panel if needed.)
- Electronics-safe attachments (optional)(Use around exterior surfaces; avoid interior components.)
- ESD mat (optional)(Provides a grounded work surface.)
Steps
Estimated time: 45-60 minutes
- 1
Power down and unplug
Turn off the PC completely and unplug all cables. This eliminates the risk of electric shock and accidental short circuits during handling.
Tip: Always unplug before opening the case. - 2
Ground yourself
Wear an anti-static strap or touch a grounded metal surface to discharge any built-up static before touching internal components.
Tip: Avoid touching exposed circuitry with bare hands. - 3
Open the case and inspect dust
Remove the side panel carefully and visually inspect major dust hotspots: GPU fans, CPU cooler, and PSU area. Plan your cleaning approach.
Tip: Take photos of cable routing to aid reassembly. - 4
Exterior cleaning with safe tools
Use a soft brush and microfiber cloth to wipe exterior surfaces and accessible interior areas. Avoid direct vacuuming of internal parts.
Tip: Do not suction over connectors or PCB traces. - 5
Interior dust with compressed air
Blow dust from fans and heatsinks with short bursts at a safe distance. Do not linger in one spot and never spray while powered.
Tip: Keep hands clear of rotating fans. - 6
Reassemble and test
Reattach the side panel, reconnect everything, and power on to verify stability. Check temps and fans for smooth operation.
Tip: Run a quick stress test to confirm airflow. - 7
Schedule maintenance
Create a routine (e.g., quarterly) to minimize dust buildup. Adjust frequency based on environment.
Tip: Document dates and results for future reference.
FAQ
Is it safe to use a vacuum near a powered PC?
Not generally. Avoid direct suction on powered electronics. Unplug the system first and use safer methods for exterior cleaning or very light, distant suction around the case only.
Avoid using a vacuum near a powered PC. Unplug the system and use safer exterior cleaning methods, or light suction around the case only.
Can I use a vacuum to clean inside the PC case?
No. Vacuuming inside can cause static damage or dislodge components. If interior dust is heavy, use compressed air with caution and keep the PC unplugged.
Do not vacuum inside the PC case. Use compressed air and unplugged operation to remove dust safely.
What tools are best for PC dust removal?
Soft brushes, microfiber cloths, and compressed air are recommended. An anti-static wrist strap adds safety when handling internals.
Soft brushes, microfiber cloths, and compressed air are best; use an anti-static strap when touching internals.
How often should I clean my PC?
In dusty environments, every 3-4 months is common. In quieter homes, a quarterly check usually suffices.
Clean your PC every few months, depending on dust levels and environment.
Can using a vacuum damage fans or PCIe cards?
Yes, direct suction or static discharge can harm fans or board components. Avoid direct vacuuming of interior parts.
Direct vacuuming can damage fans or cards; avoid interior suction.
Are there safe vacuum options for electronics?
There are electronics-safe or anti-static vacuums, but they still require caution and are not substitutes for proper external cleaning. Safer to rely on compressed air and brushes.
Electronics-safe vacuums exist, but use them with caution and prefer brushing and compressed air.
Watch Video
The Essentials
- Avoid internal vacuuming; use safer methods.
- External cleaning is effective when done with care.
- Always unplug and ground yourself before handling the PC.
- Use compressed air for interior dust instead of a vacuum.
- Establish a regular maintenance routine to minimize dust.