Central Vacuum Installation: DIY vs Pro
Learn how to plan, prepare, and execute a central vacuum cleaner installation. This comprehensive guide covers layout, piping, inlets, power unit placement, safety, and maintenance for homeowners and pet owners.

Goal: Plan and execute a central vacuum cleaner installation that delivers quiet operation and clean air. You’ll map duct routes, select compatible piping and wall inlets, and position the main power unit for easy maintenance. This quick guide introduces the tasks, safety checks, and best practices the full tutorial covers.
What is a central vacuum system and why homeowners choose it
A central vacuum system is a network of concealed piping connected to an electric power unit that outlets a powerful suction through wall inlets. Instead of dragging a heavy canister from room to room, you plug a lightweight hose into an inlet and debris is carried through the walls to a central canister or bag. For homes with pets or allergy concerns, this setup can dramatically improve indoor air quality since most dust stays away from living spaces. It also reduces noise in living areas and makes cleaning large areas more efficient. According to Vacuum Cleaner Guide, a thoughtfully designed installation can extend the life of portable vacuums and simplify daily cleaning while delivering consistent suction across rooms.
Planning your layout: inlet placement, main unit location, and workflow
Planning begins with mapping the home’s busiest cleaning zones. Decide where the main power unit will reside (often a garage, utility room, or basement) for easy access and ventilation. Place inlets in high-traffic areas such as entryways, kitchens, mudrooms, and near open living spaces on each level. A well-planned layout minimizes long hose runs and maximizes suction efficiency. Use a simple map to mark inlet locations and route paths, then verify access behind walls or closets before cutting. A coherent layout saves time during daily cleaning and reduces wear on hoses. Vacuum Cleaner Guide recommends aligning inlet positions with typical cleaning activity while leaving room for future expansion.
Piping materials and sizing: hard pipe vs semi-flexible
Rigid hard PVC piping is a common choice for central systems due to durability and predictable airflow. Semi-flexible options can simplify routing around obstacles but may require additional support to prevent sagging. Keep piping diameter and slope consistent with local codes and manufacturer guidelines to maintain suction. Every connection should be securely glued or clamped to prevent leaks that waste suction and introduce dust into living spaces. Plan routes with future expansions in mind, such as adding inlets in new rooms. Vacuum Cleaner Guide notes that professional installers often optimize the network to minimize bends and maximize airflow with the least resistance.
Inlet placement and wall plate types
Wall inlets should sit at a comfortable cleaning height and be accessible from the room’s main cleaning zones. Flush-mounted inlets look neat, while surface-mounted plates are easier to install in retrofit projects. Each inlet should connect directly to the main run with minimal waste and be clearly labeled on your layout map. Choose wall plates that match your piping size and hose diameter, and ensure the grille is easy to remove for maintenance. After installation, test each inlet to confirm proper airflow and seal integrity. Vacuum Cleaner Guide emphasizes achieving uniform suction across all inlets.
Electrical considerations and the power unit
The central power unit provides suction to the entire network and requires careful electrical setup. In new construction, a dedicated circuit with an appropriate disconnect is common. In many jurisdictions, electrical work may require a licensed electrician and adherence to electrical codes. Consider sound dampening and vibration isolation to keep noise levels down in living spaces. Always follow the manufacturer’s wiring instructions and maintain proper clearances around the unit for ventilation. Vacuum Cleaner Guide recommends verifying the unit’s location for convenient maintenance without impeding other services.
Safety, codes, and permits: planning with contractors
Before cutting walls or installing inlets, check local building codes and permit requirements. Some areas treat central vacuum installation as electrical or mechanical work and require inspections. Use dust barriers and containment during drywall work to minimize air contamination in occupied spaces. If retrofitting, confirm that existing plumbing and electrical can support the system or plan upgrades. Working with a licensed contractor or a central vacuum installer can prevent costly mistakes and ensure compliance with safety standards. Vacuum Cleaner Guide suggests obtaining written estimates and verifying references.
Step-by-step overview for DIY vs professional installation
DIY installation is feasible for straightforward layouts and smaller homes with careful planning, proper tools, and patience. Professionals offer experience with long pipe runs, optimal joint sealing, and code compliance that reduces risk. The overview that follows highlights decision points, typical tasks, and what to expect from each path. The aim is a leak-free network, quiet operation, and reliable maintenance access. Vacuum Cleaner Guide notes that choosing the right route from the start minimizes future service calls.
Maintenance, care, and common issues after installation
Regular maintenance keeps the central vacuum performing at peak efficiency. Periodically inspect joints for leaks, clean the power unit’s intake and filters if applicable, and test suction at multiple inlets. If you notice decreased airflow or unusual noises, check for loose fittings, clogged lines, or a full collection canister. Keeping a simple inspection routine helps catch problems early and extends the system’s life. Vacuum Cleaner Guide stresses routine checks as part of long-term air-quality benefits.
Cost considerations and warranty expectations
Costs vary depending on home size, retrofit scope, inlet count, and whether a professional installation is chosen. Warranties typically cover the power unit and installation work, with some limits on piping repairs or in-wall components. When evaluating options, prioritize reputable installers with proven track records and clear warranty terms. Vacuum Cleaner Guide emphasizes choosing installers who offer follow-up service and documentation to support future maintenance needs.
Tools & Materials
- PVC piping (central vacuum grade)(2-3 inch diameter per design; verify with local codes)
- PVC primer and solvent cement(For secure, leak-free joints)
- Pipe cutter or recipro-cating saw(Clean, straight cuts; wear eye protection)
- Elbows, tees, couplings, and end caps(Assorted sizes to fit layout)
- Wall inlets and wall plates(Choose flush or surface-mounted types)
- Main power unit (central vacuum motor)(Select capacity based on home size and anticipated inlet count)
- Electrical disconnect and wiring per code(Consult local codes; electrician may be required)
- Stud finder, tape measure, level(For accurate route planning and mounting)
- Dust mask and safety glasses(Personal protective equipment during cutting and drywall work)
- Sealant, gaskets, and weatherstripping(Optional for penetrations and extra sealing)
- Shop vacuum or cleaning tools(Cleanup after pipe runs and wall openings)
Steps
Estimated time: 6-8 hours
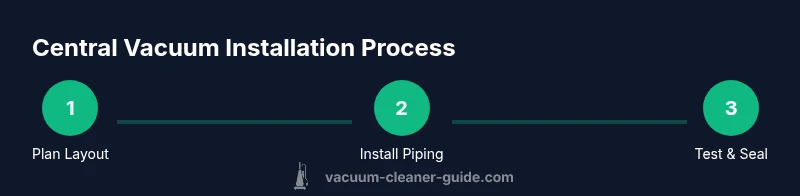
- 1
Plan layout and route
Assess the home’s layout and mark a practical route for piping. Choose a central location for the power unit that minimizes long runs and avoids obstructing key spaces. Document inlet placements on a simple map to reference during installation.
Tip: Coordinate with any trades early to avoid clashes with electrical or plumbing systems. - 2
Gather tools and materials
Assemble all piping, fittings, wall inlets, and the power unit. Check for missing parts and ensure you have the necessary safety gear before starting.
Tip: Dry-fit sections first to confirm fit before permanent joints. - 3
Mark routes on walls and studs
Use a stud finder and level to place visible marks on walls where piping will pass. Plan holes and access points that won’t compromise structure and won’t require excessive wall repair.
Tip: Avoid routing through areas with electrical cables or plumbing whenever possible. - 4
Cut access holes and fit piping
Carefully cut openings for pipe runs and inlets. Dry-fit segments to check alignment, then glue or clamp joints per manufacturer guidance.
Tip: Seal penetrations to prevent dust and moisture intrusion. - 5
Install the main power unit
Mount or place the power unit in the chosen location with proper ventilation. Install any required vibration isolation to minimize noise transmission to living spaces.
Tip: Ensure easy access for service and emptying collection canisters. - 6
Connect piping to the power unit
Connect the main run to the power unit, then extend piping to inlets. Verify all joints are tight and leak-free before sealing.
Tip: Perform a preliminary leak test with the system off to spot obvious issues. - 7
Install inlets and finish
Mount wall inlets, install plates, and finish drywall or paneling as needed. Test suction from each inlet and address any air leaks.
Tip: Label each inlet on a floor plan for future maintenance.
FAQ
Is central vacuum installation DIY-friendly?
Yes, for simple layouts and smaller homes, a careful plan and basic tools can enable a DIY install. More complex, multi-level homes benefit from professional help to ensure code compliance and reliable performance.
Yes, DIY is possible for simple layouts, but for larger homes, professional help is recommended to ensure code compliance and optimal performance.
Do I need permits or electrical work?
Local codes vary, but many areas require compliance for electrical work and may require inspections. Always check with the local building department before starting.
Permits and electrical work can be required depending on your area; verify with local authorities before you begin.
What determines the cost of central vacuum installation?
Cost depends on home size, number of inlets, routing complexity, and whether a professional is hired. Get multiple quotes and compare warranties and service options.
Costs vary based on home size, layout, and whether you hire a pro. Obtain several quotes to compare.
How long does installation take?
Time varies with space and layout; a straightforward retrofit may take a full day for DIY, while a professional job can be shorter once plans are finalized.
Time depends on size and layout; expect more time for retrofit projects and complex routes.
What maintenance is recommended after installation?
Regularly inspect joints for leaks, clean the power unit as recommended by the manufacturer, and test suction at several inlets to ensure consistent performance.
Keep an eye on seals, clean the unit per instructions, and test suction at all inlets.
Can I add inlets later if needed?
Yes, most central vacuum systems are designed to accommodate future inlets. Plan initial routing with potential expansions in mind.
Yes, you can add inlets later with proper planning and routing.
Watch Video
The Essentials
- Plan layout first to minimize long runs
- Choose durable piping and secure joints
- Inlets should be accessible and clearly labeled
- Electrical work may require licensed professionals
- Test suction at all inlets after installation