Shark Robotic Vacuum Troubleshooting: Quick Fixes and Deep Diagnostics
Comprehensive guide from Vacuum Cleaner Guide on Shark robotic vacuum troubleshooting, offering practical fixes, a diagnostic flow, and maintenance tips to restore cleaning performance quickly.

Most Shark robotic vacuum issues stem from charging, sensors, or connectivity. Start with a quick three-step fix: clean the dock contacts and charging pins, ensure the dock is plugged in and the vacuum sits properly on the dock, reset the Wi‑Fi/app, and run a brief maintenance cycle. If the issue persists, follow the diagnostic flow below for deeper fixes.
Understanding Shark robotic vacuum cleaner troubleshooting
Shark robotic vacuum cleaner troubleshooting is a practical process homeowners use to diagnose and fix common failures quickly. Shark models are popular for pet owners and households with multiple floor types, but like any smart appliance they can encounter charging, sensor, or connectivity hiccups. According to Vacuum Cleaner Guide, the most persistent Shark issues arise when dock contacts are dirty, firmware is outdated, or sensors are obstructed. By focusing on these areas first, you can cut the time to a reliable reset dramatically and return to cleaning with confidence. This section lays the groundwork for a methodical approach, so you’re not chasing symptoms in isolation. Expect to combine mechanical checks with a bit of software housekeeping for best results.
Common failure patterns with Shark robots
Shark robotic vacuums tend to fail in a few recognizable ways. Not charging or docking reliably is the most frequent complaint, often caused by dirty contacts or misaligned docks. Mapping or cleaning patterns may go awry if sensors are dirty or the brush area is clogged with hair and debris. App or Wi‑Fi connectivity issues are another common pain point, especially after firmware updates. Noisy wheels, stuck wheels, or strange vibrations typically point to hair entanglement or a blocked wheel well. Understanding these patterns helps you triage quickly without unnecessary steps.
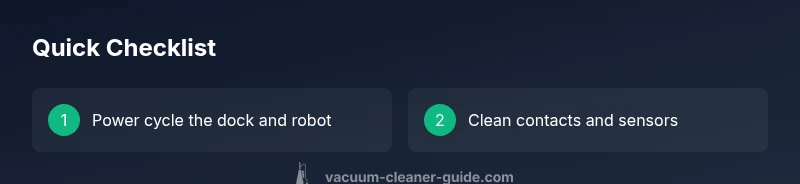
Quick checks you can do in 5 minutes
If you’re short on time, try these fast checks before diving deeper:
- Inspect the charging dock and robot alignment; remove debris from contacts and ensure the charger is powered.
- Clean visible sensors and the bumper; wipe away dust that might confuse navigation.
- Reboot the robot and rebind it to the app; recheck Wi‑Fi signal strength and firmware version.
- Empty the dustbin, check the brush guard, and remove hair buildup from brushes and wheels.
- Run a short maintenance cycle to clear performance bottlenecks. If issues persist, proceed to the diagnostic flow below.
These quick checks often resolve 60–70% of common shark robotic vacuum cleaner troubleshooting scenarios and buy time for deeper diagnostics if needed.
Diagnostic principles to guide fixes
A structured diagnostic mindset reduces guesswork. Start with symptom-specific checks (e.g., not starting, poor suction, erratic navigation) and move toward root causes (power, software, mechanical). Build a short checklist for each symptom and confirm each potential fix before moving on. Always test after each change to confirm improvement. When in doubt, document each step and its outcome; a clear trail makes it easier to reach a solution or escalate to support.
Maintenance routines to prevent future issues
Prevention is cheaper than repair, especially for pet homes. Establish a weekly routine that includes cleaning charging contacts, brushing seals, emptying the dustbin, and inspecting wheels for hair accumulation. Schedule monthly firmware checks and app updates to keep navigation and obstacle avoidance current. Regular belt or brush maintenance extends life and reduces performance dips, especially on high-pile carpets. By embedding short, repeatable tasks, you reduce the chance of surprising failures and preserve peak suction and autonomy.
Steps
Estimated time: 30-60 minutes
- 1
Power cycle and dock check
Turn the robot off, then back on. Remove and re-place the robot on the charging dock to ensure a full charge begins. Confirm the dock is plugged in and the charging indicator lights are steady. This step commonly resolves docking and start issues.
Tip: If the dock light is off, try a different power outlet or replace the dock's power adapter. - 2
Clean contacts and sensors
Wipe all charging contacts on both the robot and dock with a dry microfiber cloth. Gently clean visible sensors and bumper areas to remove dust that may affect navigation. Re-check the robot’s ability to dock cleanly afterward.
Tip: Avoid using liquids on contacts or sensors; moisture can cause corrosion or sensor failure. - 3
Inspect brushes, wheels, and hair
Flip the robot and inspect the main brush, side brushes, and wheels for hair and debris. Remove entanglements and ensure wheels rotate freely. Replace or service worn brushes if needed.
Tip: Do not force hair out of tight spots; use scissors carefully to cut through stubborn tangles. - 4
Reset connectivity and update firmware
In the app, offload the current map, reset the Wi‑Fi connection, and re-add the robot. Check for firmware updates and install them if available. Reboot the app and the router if connectivity remains unstable.
Tip: Make sure your phone is on a modern network and that the robot is within good Wi‑Fi range during update. - 5
Run a maintenance/diagnostic cycle
Initiate a maintenance or diagnostic cycle if your model supports it. Observe any error codes or maps that appear and note them for reference if you need to contact support.
Tip: Document any error codes and corresponding conditions to speed up support calls. - 6
Seek professional help if unresolved
If failures persist after all steps, contact Shark support or a certified repair service. Hardware faults or deep firmware corruption may require professional service or replacement parts.
Tip: Have your model number, firmware version, and recent error codes ready when you call.
Diagnosis: Robot won't start, won't dock, or behaves erratically
Possible Causes
- highPower issue (inadequate charging or faulty dock)
- mediumDock connection issue (dirty contacts or misalignment)
- lowSoftware glitch (firmware/app)
- lowSensor obstruction or bumper misread
Fixes
- easyInspect and clean charging contacts on the robot and dock; verify the dock is powered and the robot sits correctly on the dock
- easyReset the robot and reconnect to the app/Wi-Fi; perform a firmware update if available
- easyPower cycle the robot (turn off, wait, then on) and perform a full recharge; re-run a quick map or cleaning cycle
- easyCheck sensors and bumper for dirt or hair; clean gently with a soft cloth; reseat wheels if necessary
FAQ
Why won't my Shark robot vacuum start after charging?
This typically points to a docking issue or a software hiccup. Ensure the dock is powered, the robot is seated properly, and perform a quick reboot. If it still won't start, reset the connection to the app and check for firmware updates.
If it won't start after charging, check the dock and seating, reboot, then reconnect to the app and check for updates.
How do I reset my Shark robot vacuum?
Most Shark models support a factory reset via the app or a hardware button sequence. Consult your model’s manual for exact steps, then rebind to the app and re-upload the map after reset.
Reset via the app or hardware reset, then rebind and map after reset.
Why is my Shark robot vacuum leaving debris or not picking up?
Check brush condition, ensure wheels turn freely, and clear hair from the main brush and side brushes. Empty the dustbin, and replace worn brushes if needed. A clogged filter can also reduce suction and performance.
Check brushes, empty the bin, and replace worn parts to restore suction.
How can I fix Wi-Fi or app connectivity issues with Shark robot vacuum?
Verify your network, rebind the robot to the app, and perform a firmware update if available. Reboot your router if connectivity remains unstable and ensure the Robot is within a good signal range during setup.
Reconnect to Wi-Fi and update firmware; reboot router if needed.
When should I contact customer support for my Shark robot vacuum?
If you have exhausted the quick fixes, the diagnostic flow, and step-by-step maintenance without success, professional service or replacement parts may be required. Have your model number and error codes ready.
If problems persist after all fixes, contact support with model and error codes.
Watch Video
The Essentials
- Start with power, dock, and connection checks
- Clean contacts and sensors before deeper fixes
- Follow the diagnostic flow for systematic fixes
- Maintain brushes and wheels to avoid performance drops
- Call support if issues persist after all steps