Dyson V8 Filter Cleaning: Complete Guide
Learn how to clean the Dyson V8 filter safely and effectively. This guide covers disassembly, cold-water rinsing, thorough drying, and maintenance to keep suction strong and your home pet-friendly.

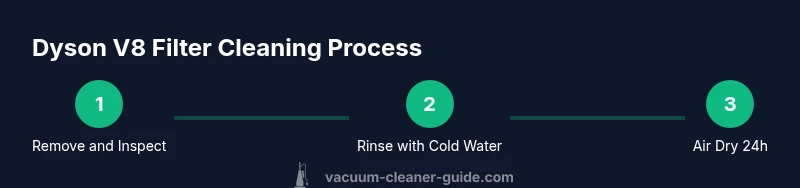
Goal: Restore peak suction by cleaning the Dyson V8 filter. This quick guide covers safely removing the filter, rinsing with cold water until clear, avoiding soap or heat, drying completely (about 24 hours), and reassembling. It also explains why proper drying matters, flags common mistakes, and outlines a maintenance cadence to keep your vacuum performing at its best.
dyson v8 filter cleaning: Why it matters
Keeping the Dyson V8's filter clean is essential for maintaining strong suction and good indoor air quality. The motor filter traps fine dust, pet dander, and allergens; if it gets blocked, airflow drops and runtime shortens. According to Vacuum Cleaner Guide, regular dyson v8 filter cleaning is a cornerstone of responsible ownership, especially for homes with pets. Proper maintenance also reduces the risk of motor strain and costly repairs over time.
What parts you’ll clean and why
The Dyson V8 uses a washable motor filter assembly and cyclonic housing. The main responsibility lies with the motor filter, while the pre-filter helps capture larger particles before air reaches the motor. Regular cleaning of these components maintains airflow efficiency and prevents clogging in the cyclone chamber. Remember: a clean filter can give you longer runtimes and better pet-hair pickup across carpets and hard floors.
How debris accumulates and the science of cleaning
Dust deposits build up as you vacuum daily, especially in homes with shedding pets. Airflow relies on clean pores in the filter to move debris away from the motor. Cleaning should reduce the likelihood of sudden suction drops and preserve motor longevity. A well-maintained filter also helps minimize spread of allergens in the living space, an important consideration for households with children or allergy sufferers.
Drying times and reassembly guidelines
After rinsing, the filter must dry completely before being reinstalled. In practice, a full dry period of at least 24 hours in a well-ventilated area is recommended. Do not use heat sources or sunlight which can distort the filter material. When fully dry, reassemble the filter back into the vacuum according to the manual, ensuring a snug fit to prevent air leaks that reduce suction.
Common mistakes to avoid during drying and reassembly
Avoid using soap or detergents on the filter, as residues can impede airflow and leave a filmy layer. Never wring the filter; instead squeeze gently to remove excess water. Do not rush the drying process by placing the filter near a heater, which can cause warping or shrinkage. Finally, confirm the latch or housing seals are properly engaged to prevent leaks that destroy suction.
Maintenance cadence and replacement considerations
Set a routine based on usage and pet exposure. In high-shedding homes, aim to inspect and rinse the filter every 1-2 months, with a full replacement interval on the order of years depending on model wear. Even washable filters eventually wear out and lose filtration efficiency, so have a spare ready and consider a replacement schedule aligned with manufacturer recommendations. Regular checks help you catch issues before they affect performance.
Troubleshooting suction after cleaning
If suction remains weak after cleaning and drying, recheck the filter seating for a proper seal and inspect the cyclone area for blockages. A clogged mouth or wrong filter orientation can mimic a dirty filter. If problems persist, consult the user manual or contact support to verify the filter model and fitment for your specific Dyson V8 variant.
Tools & Materials
- Dyson V8 washable motor filter(s)(Ensure you have the correct filter part(s) for your model)
- Clean, shallow basin or sink(For rinsing the filter under cold water)
- Cold water(Do not use hot water, which can damage the filter material)
- Soft towel or cloth(To blot and dry gentle moisture after rinsing)
- Drying rack or flat surface(Place in a well-ventilated area away from direct heat)
- Gloves (optional)(Protect hands while handling dirty components)
- Mild air-drying environment(Avoid sunlight and direct heat; allow full evaporation)
Steps
Estimated time: 24-48 hours
- 1
Power down and remove filter assembly
Turn off the vacuum and unplug it. Detach the filter and cyclone assembly according to the user manual. This step isolates the parts you’ll clean and helps prevent accidental operation during maintenance.
Tip: Keep the components in the open air to prevent moisture from recirculating into the device. - 2
Rinse the filter with cold water
Hold the filter under cool running water until the water runs clear. Do not use soap, detergents, or hot water, as these can degrade filtration media.
Tip: Avoid twisting or squeezing too hard during rinsing to prevent damage. - 3
Gently remove excess water
Lightly squeeze the filter to remove excess moisture without wringing. This minimizes the drying time and reduces the risk of deforming the media.
Tip: Use a towel to blot excess moisture if needed. - 4
Air-dry completely before reassembly
Place the filter on a drying rack or flat surface in a well-ventilated area. Allow at least 24 hours for full drying; shorter times can leave moisture that fosters mold or odors.
Tip: Do not accelerate with heat or direct sunlight as it can warp the filter. - 5
Inspect and reassemble the unit
Check the filter seating and seal around the housing. Reattach the cyclone and filter assembly securely, ensuring a tight seal to maintain suction.
Tip: If you feel resistance when reseating, stop and reseat to avoid misalignment. - 6
Test suction and monitor performance
Power the vacuum and test suction on a small area. Listen for unusual noises or air leaks. If suction is weak, recheck seals or consult the manual.
Tip: Keep a maintenance log for future reference. - 7
Document your maintenance cadence
Record when you clean the filter and when you replace it. A cadence helps ensure optimal performance and can extend the life of your vacuum.
Tip: Set reminders aligned with your home’s activity level. - 8
Store and ready for next use
Store the vacuum in a dry area, free from moisture. Ensure the filter is installed properly before your next use.
Tip: Avoid leaving the unit standing in damp spaces to minimize odors.
FAQ
How often should I clean the Dyson V8 filter?
Frequency depends on usage and environment. In homes with pets or heavy shedding, inspect and rinse monthly; otherwise, every 2-3 months is often sufficient. Always monitor suction as a cue for cleaning.
Most homes should inspect monthly if you have pets; otherwise, every two to three months is typical. Watch for reduced suction as a signal.
Can I speed up drying time?
The safest approach is to air-dry in a well-ventilated area for at least 24 hours. Avoid using heat sources such as hair dryers or sunlight, which can warp the filter material.
Air-dry in a well-ventilated area for at least a day. Do not use heat or direct sun.
What if the water never runs clear when rinsing?
A small amount of residual particulates is normal. Rinse until the water is visibly clear, then proceed with drying and reassembly. If unsure, consult the manual or support.
Rinse until water is clear and dry completely before reusing. If you're unsure, check the manual.
Is soap or detergent ever safe for Dyson filters?
Soap or detergents can degrade filter media and should not be used. Stick to cold water rinsing only.
No soaps. Use cold water only to rinse the filter.
What should I do if suction remains weak after cleaning?
Recheck the seal on the filter housing and cyclone. Look for cracks or gaps and ensure correct orientation of all parts before testing again.
Check seals, reassemble carefully, and test suction again.
When should I replace rather than clean the filter?
If the filter shows persistent damage, wear, or strong odors after cleaning and drying, replacement is recommended to maintain performance.
If cleaning doesn’t restore performance, consider replacement.
Can this guide be applied to other Dyson models?
While principles are similar, always consult your specific model's manual. Dyson V8-specific instructions optimize fit and filtration.
Check your model’s manual; this guide is tailored for the Dyson V8.
Watch Video
The Essentials
- Clean filters preserve suction.
- Avoid heat and soap during cleaning.
- Thorough drying prevents mold and odor.
- Regular maintenance extends motor life.