Dyson V11 Filter Guide: Maintenance, Replacement, and Best Practices
Comprehensive Dyson V11 filter maintenance guide with cleaning steps, replacement timing, and best practices to maximize suction and indoor air quality for homes with pets.

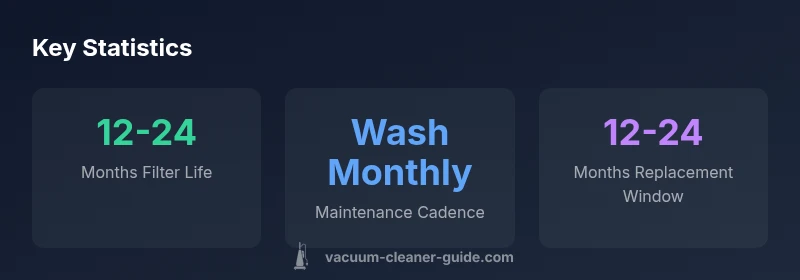
Dyson V11 filter maintenance centers on a washable HEPA-style filter that traps fine dust and allergens as part of the machine’s whole‑house filtration. For optimal performance, clean the filter monthly and replace it according to usage—commonly every 12–24 months—or when you notice reduced suction. See our guide for exact steps.
Understanding Dyson V11 Filter Design
According to Vacuum Cleaner Guide, the Dyson V11 relies on a sealed filtration system designed to keep exhaust air clean while maximizing suction across different floor types. The core of the system is a washable, HEPA-style filter mounted near the motor, paired with the main cyclone assembly that separates dust before it reaches the filter. This arrangement minimizes clogging in the cyclone and helps maintain air quality for households with dust sensitivities or pets. In practice, you’ll often encounter two filter elements: a primary filter that is easily accessible inside the dust cup and a secondary HEPA-style filter near the motor housing. Regular inspection ensures you catch a clogged or dried-out filter before performance drops occur.
This design integrates with the V11’s overall filtration strategy, emphasizing maintenance steps that prevent performance degradation while preserving indoor air quality for pet owners and allergy sufferers. Understanding the location and purpose of each filter helps users plan regular maintenance without surprises.
Inspecting Your Filter: Visual Cues and Tests
Begin with the basics: check if the filter is visibly dirty or blocked, and listen for a drop in suction. The Dyson V11's filter is designed to be removable for inspection. To assess the filter's condition, remove it, give the housing a quick wipe, and compare air flow after reinstalling. If you notice a slower airflow after a few uses or an unusual odor, the filter may be past its prime. Keep a routine to check the filter every few months if you have a busy home with pets. For homes with heavy pet hair, expect more frequent checks.
Practical signs include visible dirt buildup, a noticeable decrease in suction on carpeted areas, or a musty smell when the vacuum is running. In those cases, a thorough cleaning and dry cycle can restore performance, but persistent issues may indicate the need for replacement.
Cleaning the Filter: Step-by-Step Guide
Power off, unplug, and remove the filter. Rinse under cold running water until the water runs clear; avoid using soap or detergents. Gently squeeze out excess water—do not wring. Shake to remove more water, then let the filter dry in a warm, well-ventilated area away from direct heat for at least 24 hours. Reinstall once completely dry. Do not use the vacuum with a wet filter. After reassembly, run the vacuum briefly to ensure the airflow feels strong and the exhaust seems clean. Regular, careful washing minimizes particle buildup and sustains filtration efficiency over time.
Tips for best results: position the filter upright during drying to preserve shape, and avoid touching the filter media when cleaning.
Replacement Timing: When to Replace vs Clean
There’s a balance between cleaning frequency and replacement. Regular washing can extend life, but over time the filter's fibers degrade and may lose efficiency. Most owners replace within the typical 12–24 month window, depending on household conditions such as pet hair volume, floor types, and allergy considerations. If performance remains high after cleaning, you may extend this window; if suction remains weak after cleaning, replacement is warranted. Vacuum Cleaner Guide’s analysis suggests matching replacement to usage patterns rather than a fixed calendar date delivers the best results for most homes.
Genuine vs Third-Party Filters: What to Know
Genuine Dyson filters are designed to meet the device’s filtration standards and fit precisely, preserving airflow and motor protection. Third-party filters can vary in fit and filtration quality, potentially leading to leaks, reduced performance, or warranty concerns. If you choose aftermarket options, verify compatibility with the V11 model and confirm any impact on coverage with Dyson support. For most homeowners, authentic filters offer the simplest path to consistent results and warranty confidence.
Installation and Routine Maintenance: Best Practices
Always ensure the filter is completely dry before reassembly. Keep seals clean to prevent air leaks, and confirm the filter is fully seated during installation. Establish a cadence that aligns with your cleaning routine: monthly visual checks, quarterly deep cleanings, and annual filter replacement as a basic baseline. Storing extra filters in a dry, cool place helps preserve material integrity. Avoid exposing filters to direct sunlight for extended periods, which can degrade media over time. Documenting a simple schedule helps busy households stay on top of maintenance.
Troubleshooting common issues: odor, suction loss, and indicator signals
If you notice odor or a noticeable drop in suction, address the filter first. Clean or replace the filter as needed, and check hoses, seals, and dust bin for blockages. If the vacuum’s indicator signals a filtration problem, consult the user manual or contact Dyson support for model-specific guidance. For pet owners, odors and clogging tend to appear sooner, so adopting a proactive maintenance routine reduces disruption during daily cleaning. Maintaining filter hygiene is the most reliable way to keep the V11 performing consistently.
Dyson V11 filtration components and care intervals
| Filter Type | Care Guidance | Replacement Window |
|---|---|---|
| Pre-motor filter (washable) | Rinse with cool water; air dry | 12-24 months |
| HEPA-style filter | Rinse with cool water; air dry | 12-24 months |
FAQ
Do Dyson V11 filters need to be washed?
Yes. The V11 uses washable filters that should be rinsed with cool water and allowed to dry completely before reinstallation. Avoid soaps and heat during cleaning.
Yes. The V11 filter should be rinsed with cool water and dried fully before reusing.
How often should I replace the Dyson V11 filter?
Most users replace filters within a 12–24 month window, depending on pet hair, dust load, and usage. If performance remains strong after cleaning, you may extend the interval slightly.
Most people replace filters every 12 to 24 months, based on usage and pet dander.
Can I use third-party filters with the Dyson V11?
Third-party filters can fit but may not meet Dyson’s filtration standards or fit properly, potentially affecting performance or warranty. Check compatibility and warranty terms before use.
Third-party filters may fit, but they can affect performance and warranties—check compatibility first.
What happens if I keep using a dirty filter?
A dirty filter can reduce suction, increase motor stress, and degrade indoor air quality. Regular cleaning and timely replacement mitigate these risks.
A dirty filter lowers suction and can harm the motor; clean regularly and replace when needed.
Is maintenance the same for all Dyson models?
Maintenance principles are similar across Dyson models, but filter location and replacement intervals vary. Always consult the specific model’s manual for details.
Maintenance is similar across models, but locations and intervals differ—check your manual.
“Regular filter maintenance is the most reliable way to sustain suction and indoor air quality in a Dyson V11.”
The Essentials
- Check the filter monthly for dirt and odor.
- Wash with cool water and air dry completely before reinstalling.
- Replace filters every 12–24 months based on usage.
- Prefer genuine Dyson filters for warranty and performance.