Why Is My Vacuum Cleaner So Loud? A Practical Troubleshooting Guide
A practical, step-by-step guide to diagnose and fix loud vacuums, from blockages to worn parts, with quick checks, diagnostics, and maintenance tips from Vacuum Cleaner Guide.

If your vacuum is unusually loud, you’re not alone. According to Vacuum Cleaner Guide, most noise comes from airflow blockages, worn parts, or loose attachments—problems you can often diagnose and fix without tools. If you’re wondering why is my vacuum cleaner so loud, start with quick checks for blockages, then inspect the belt and filters. This quick answer gives you the most likely causes and the simplest fixes, so you can restore suction and quiet operation fast.
Why is this happening? Understanding the noise you hear can save time and restore cleaning power quickly. According to Vacuum Cleaner Guide, most loud vacuums share a few repeatable causes, and many can be addressed with basic maintenance. If you're wondering why is my vacuum cleaner so loud, start by checking for simple issues like blockages, loose parts, and worn belts. This section explains how noise emerges from airflow and mechanical wear, and why you should treat it as a signal rather than a nuisance. Noise can be a high-pitched scream, a muffled rumble, or a grinding clank, and each pattern often points to a different culprit. By identifying the pattern early, you protect the motor, belts, seals, and filters from premature wear. This approach is practical for homeowners and pet owners who want reliable guidance that doesn’t require expensive diagnostics. You’ll gain a clear framework for testing components, isolating noise sources, and deciding whether a quick DIY fix is enough or if professional service is warranted.
Common culprits behind the noise
- Blockages in the wand, hose, or nozzle: Debris reduces airflow and makes the motor work harder, creating louder operation. - Worn or damaged belt and brush roll: A stretched belt or frayed connectors often produces a whine or a slapping sound. - Dirty or clogged filters: When the filter can't breathe, the motor strains and noise rises. - Loose screws, rattling attachments, or a loose brush head: Vibrations amplify when parts aren’t tightly secured. - Worn motor bearings or exhaust pathway wear: These louder, grinding noises indicate aging or internal wear that commonly requires service. - Placement on soft surfaces or thick rugs: Excess friction can amplify sound even when the motor is healthy.
Airflow, filters, and attachments: how noise changes
Noises are often tied to airflow and filtration. Clogged filters, full bags, or a blocked exhaust reduce airflow and force the motor to work harder, generating more noise. Vacuum Cleaner Guide Analysis, 2026 suggests that even small airflow restrictions can increase sound levels noticeably, especially on high suction settings. Attachments such as pet-hair tools or crevice tools can also change the tone, depending on how they seal against the intake. When you swap from a bare floor to carpet, you may hear a difference because the brush roll engages more, increasing both airflow resistance and vibration. In general, maintaining clean filters, a clear bag, and an unobstructed exhaust path can dramatically reduce noise without sacrificing suction. If you’re trying to define the source, test the same setting on a clean floor with different attachments to hear how each factor influences the sound.
Do-it-yourself checks you can safely perform
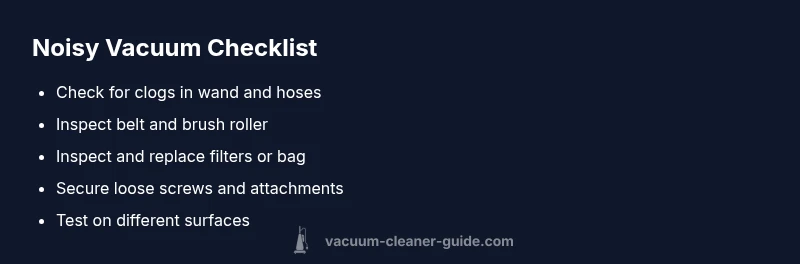
- Unplug the unit and visually inspect for obvious blockages in the wand, hoses, and around the brush head. Clear debris with a flexible tool and avoid using tools that might damage components. - Check hoses and wand for kinks or crush points; a simple bend can cut airflow and amplify noise. - Inspect the belt and brush roller; a frayed belt or a stiff, worn brush will cause whining or clacking sounds. - Filter and bag check: replace full bags or dirty filters; dirty filters reduce airflow and make the motor louder. - Listen to the motor at a low setting after each step; if the noise changes, you’ve likely narrowed the culprit to airflow or a loose component. - Reassemble and test: ensure all screws are tight and parts are seated correctly before a final test run. Tip: Keep a spare belt and a set of filters handy for quick fixes. Safety: Always unplug before any disassembly.
When to seek professional help and replacement considerations
If basic checks don’t quiet the unit, or you hear grinding, burning, or sizzling, stop use and seek professional service. Worn motor bearings, a degraded exhaust path, or a failing power switch may require specialized tools or parts. A technician can confirm whether the issue is with the motor, belt assembly, or an internal component that needs replacement. If the vacuum is older than its typical lifecycle and maintenance becomes frequent, compare repair costs with a replacement option. Prolonged noise can indicate escalating wear that reduces performance and reliability, so don’t delay a diagnostic if the sound persists after your checks.
Maintenance routines to prevent loud operation
Develop a lightweight, regular maintenance ritual to keep noise down: check and replace filters every 3–6 months depending on usage, inspect the belt every 6–12 months, and empty the dust cup or replace bags promptly. Clean the intake, exhaust paths, and brush roll monthly to prevent debris buildup. Store the vacuum in a clean, dry area and avoid placing it on thick rugs during operation, which can increase friction and noise. Keeping attachments loose only when in use also minimizes vibration. Establish a quick pre-clean checklist to ensure you’re addressing the most common noise sources before a deeper investigation.
Steps
Estimated time: 25-40 minutes
- 1
Safety first and prep
Power down and unplug the vacuum. Gather a clean workspace, flashlight, and a small toolkit. This first step prevents electric shock and makes future checks safer.
Tip: Keep a labeled tote for screws and parts to avoid misplacing them. - 2
Inspect exterior and attachments
Check the housing for cracks and ensure the brush head is firmly attached. A loose head or rattling casing often amplifies noise.
Tip: Tighten any loose screws gradually to avoid over-tightening plastics. - 3
Check for blockages
Detach the wand and hose and look for trapped hair, threads, or debris. Clear with a flexible brush and run a quick test to hear any change in noise.
Tip: Move slowly through the hose to avoid pushing debris further. - 4
Assess the belt and brush roller
Open the brush cover and inspect the belt; replace if frayed or missing teeth. Spin the roller to feel for stiffness or grinding.
Tip: Use the manufacturer-recommended belt type for compatibility. - 5
Examine filters and dust canister
If the unit is bagless, empty and rinse filters if permitted. For bagged models, replace bags and check that the canister is dry before reuse.
Tip: Don’t trap moisture in filters after cleaning. - 6
Test on different surfaces
Run the vacuum on both bare floors and carpets to compare noise levels. Note if the noise changes with attachment use.
Tip: If the noise only occurs on carpet, focus on brush and airflow in that path. - 7
Reassemble and perform final test
Put all parts back, ensure seals are tight, and run the vacuum at low and high suction to confirm improvements.
Tip: Listen for new sounds and stop if you notice unusual smells. - 8
Evaluate next steps
If noise persists after these steps, determine whether professional service is needed or if replacement may be more economical.
Tip: Keep a log of symptoms and fixes for future reference.
Diagnosis: Loud vacuum when in use
Possible Causes
- highBlockages in wand, hose, or intake
- mediumWorn or damaged belt or brush roll
- lowClogged filters or full bag
Fixes
- easyUnplug and clear blockages; inspect hoses and wand for obstructions
- easyCheck belt tension and replace frayed or stretched belt
- easyClean or replace filters and empty bag; ensure exhaust path is unblocked
- hardIf motor bearings are worn or internal components are damaged, seek professional service
FAQ
What is the most common reason a vacuum becomes loud?
Blockages in hoses or intake and worn belts are among the most frequent culprits. Checking these areas first often quiets the unit without special tools.
The most common culprits are blockages and worn belts, which you can usually fix with basic checks.
Can a dirty filter make my vacuum louder?
Yes. A dirty filter or full bag restricts airflow, forcing the motor to work harder and produce more noise. Replacing or cleaning parts typically reduces sound.
Yes, a clogged filter can make it louder by restricting airflow.
Is a loud vacuum dangerous to use?
Loudness alone isn’t always dangerous, but ongoing noise can indicate strain on the motor. If you hear burning smells or see smoke, stop using it and get a professional inspection.
Usually not dangerous by itself, but persistent noise can signal a motor issue.
When should I replace the vacuum instead of repairing it?
If the noise persists after basic maintenance, or the unit is old with frequent repairs, replacement may be more economical and reliable in the long run.
If it’s repeatedly needing repairs, replacement could be the smarter choice.
Why does the vacuum sound louder on carpet than on hard floors?
Carpets add friction and require the brush roll to work harder, which increases noise. Testing with and without the brush can help identify the source.
Carpet makes it louder because the brush rolls more and creates more resistance.
What maintenance can help prevent loud vacuums?
Regularly cleaning filters, checking belts, and removing blockages are the best preventive steps. Establish a simple schedule to keep noise down.
Keep filters clean and belts in good shape to prevent loud noises.
Watch Video
The Essentials
- Identify root cause quickly with simple checks
- Maintaining filters and belts lowers noise
- Regular maintenance extends vacuum life
- When in doubt, seek professional service or consider replacement