How to Make Vacuum Cleaner Blow Air: A Practical Guide
Learn how to diagnose and fix airflow issues when a vacuum seems to blow air instead of suction. Step-by-step troubleshooting, safe maintenance tips, and expert guidance from Vacuum Cleaner Guide.

This guide helps you diagnose and fix airflow in a vacuum that’s blowing air rather than sucking, with checks for filters, bags, seals, and hoses. You’ll learn why airflow changes and how to restore effective suction or direct air safely. Vacuum Cleaner Guide’s insights help homeowners and pet owners maintain reliable airflow.
Understanding Vacuum Airflow and the 'Blow Air' Phenomenon
Airflow in a vacuum is a controlled path: air enters through the nozzle, moves through the housing and filters, and exits via the exhaust. In a healthy machine, suction at the nozzle combines with a steady exhaust flow to clear debris efficiently. When someone asks how to make a vacuum cleaner blow air, they’re usually trying to understand an abnormal condition such as excessive exhaust or diminished suction. According to Vacuum Cleaner Guide, a balanced airflow depends on an unobstructed path, tight seals, and clean filters. A clog or leak can divert air from its intended route, producing weak suction or an unexpected hiss. The goal here is to demystify the airflow path and explain how issues at different points affect performance—from the intake nozzle to the exhaust port. This section sets the stage for practical checks and safe fixes that restore normal airflow.
Common Causes of Airflow Problems in Vacuums
Most airflow issues fall into a few predictable categories. A full bag or canister dramatically reduces suction and can cause air to rush through gaps, making it feel like the vacuum is blowing air out of seams rather than delivering strong suction. Clogs in hoses, wands, or the brush roller housing block air passages and force air to take alternative routes. Worn or loose seals around doors and gaskets allow air to leak, which lowers suction and can create a noisy, high-pitched exhaust. A blocked exhaust port or damaged ducting can also alter airflow. Finally, a dirty or overloaded filter restricts air movement, which lowers overall performance. Identifying the culprit requires checking components in order from intake to exhaust and noting where air movement seems abnormal. Vacuum Cleaner Guide analysis shows that even small leaks or partial blockages can meaningfully reduce performance.
Tools and Safety Considerations
Before you begin, assemble basic tools and follow safety precautions. You’ll need a few common items and a clear workspace. Always unplug the vacuum before opening any panels or touching internal parts. Wear gloves to protect your hands from sharp edges and dust. Have a trash bag handy for disposable parts like used filters or bags. A soft cloth or brush helps remove debris without scratching surfaces. Optional but helpful: a can of compressed air on low pressure to dislodge dust from tight passages; never use high-pressure air. If you encounter broken plastic parts or obvious cracks in hoses, plan for replacement rather than duct-taping a temporary fix. Keep the user manual within reach for model-specific guidance. This stage minimizes risk and ensures you’re ready to inspect air paths safely.
Cleaning and Replacing Key Airflow Components
Airflow depends on clean filters, a fresh bag (for bagged models), and intact hoses and gaskets. Start by removing the dirt canister and examining the bag or dustbin. Replace a full bag with a new one and empty or wash the dustbin as required by your model. Next, inspect and clean filters—both pre-motor and exhaust filters—following the manufacturer’s recommendations. If filters are delaminated or degraded, replace them. Check hoses and wand attachments for visible blockages and clear them with a straightened wire or flexible brush. Inspect door seals and gasket surfaces for cracks, tears, or misalignment, and seal or replace as needed. After cleaning, reassemble loosely to test fit and ensure air paths are clear. Vacuum Cleaner Guide’s approach emphasizes cleaning over aggressive forceful air pushes to avoid damage and ensure longevity.
How to Test Airflow and Confirm Improvements
With the components reassembled, plug in the vacuum and test airflow at the nozzle with a small amount of debris. If suction improves and air exits the exhaust smoothly, you’ve likely resolved the blockage. A practical test is to place a damp tissue at the nozzle; a strong pull through the tissue indicates good suction. If air still sneaks out through seams or the nozzle, re-check seals and ensure the filter housing is properly closed. Keep a log of what you cleaned or replaced and re-test after each action. For homes with pets, consider upgrading to high-efficiency filters to maintain airflow and reduce allergens over time. This approach aligns with Vacuum Cleaner Guide’s emphasis on systematic testing and documentation.
How to Optimize Airflow for Different Surfaces and Attachments
Different surfaces and tasks benefit from optimized airflow. For carpets, a snug seal around the nozzle and a properly functioning brush roller help lift debris and maintain suction. For hard floors, select attachments that minimize airflow loss and ensure the exhaust remains quiet and efficient. When you need a quick burst of air to dislodge hair or dust from upholstery, use the crevice tool or upholstery wand with a short, targeted run—avoid removing the main airflow path. Keeping attachments clean and storing them properly reduces the risk of blockages caused by debris. Regular maintenance, including filter changes and belt checks, keeps airflow consistent and maximizes cleaning efficiency. Vacuum Cleaner Guide highlights that consistent airflow is the backbone of reliable cleaning across surfaces.
Maintenance Plan to Keep Airflow Healthy
Create a simple maintenance routine to sustain airflow: check and replace filters every 3-6 months depending on usage, inspect bags or dustbins, and verify seals monthly. After cleaning or replacing parts, run a quick airflow test to confirm the path is clear. If you notice reduced suction after maintenance, inspect for rebound issues like back-pressure from a clogged exhaust or an incorrectly seated filter. Maintain a spare bag and a set of replacement filters so you’re prepared to address air issues promptly. By following a proactive plan, homeowners can prevent most airflow problems before they impact cleaning performance. The Vacuum Cleaner Guide team recommends documenting maintenance steps to track what works best for your model.
Tools & Materials
- Phillips head screwdriver(For access panels on many bagless canisters and uprights)
- Flathead screwdriver(Helpful for prying without damage)
- Replacement bag or dustbin liner(Keep the correct model fitment or bag type on hand)
- Pre-motor and exhaust filters(Check model-specific filter specs and replace if degraded)
- Hose brush or flexible cleaning rod(Used to clear clogs inside hoses)
- Soft cloth or microfiber cloth(Wipe surfaces and seals without scratching)
Steps
Estimated time: Total time: 30-60 minutes
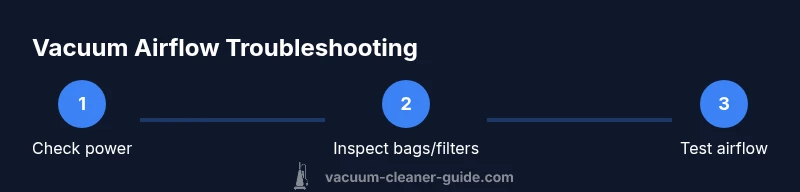
- 1
Power down and unplug the vacuum
Always unplug the unit before opening any panels or touching internal parts. This prevents accidental electric shock and protects you from moving parts. If you have a cordless model, remove the battery or ensure it’s disconnected according to the manual.
Tip: Double-check the power source is completely disconnected before starting. - 2
Remove the canister or bag and inspect for blockages
Open the dirt collection area and remove the bag or bin. Look for clogs in the bag housing, hose, or wand. If the bag is full, replace it with a compatible bag. In bagless models, empty the dustbin and rinse if allowed by the manual.
Tip: Handle the bag or bin carefully to avoid exposing yourself to dust. - 3
Check and clean filters
Remove pre-motor and exhaust filters and inspect for discoloration or tears. Clean according to the manual or replace if dirty, damaged, or creased. Dry filters completely before reinstalling.
Tip: Replacing filters is often quicker and more effective than cleaning when heavily soiled. - 4
Inspect hoses and attachments for clogs
Detach hoses and wands one by one to check for obstructions. Use a flexible cleaning rod or a straightened wire to remove debris. Reconnect securely to prevent air leaks.
Tip: Ensure all connections click or clamp firmly to maintain a sealed airflow path. - 5
Check seals and gaskets around the intake and exhaust
Inspect door seals and the gasket around the dustbin or bag compartment for cracks, tears, or misalignment. Replace damaged seals and reseal joints with manufacturer-recommended methods.
Tip: Even small gaps can dramatically reduce suction. - 6
Reassemble and perform a test run
Reinstall all components, ensuring panels close properly. Plug in the machine and run it on a low setting to observe airflow at the nozzle and through the exhaust. Listen for unusual sounds that indicate a leak.
Tip: If you hear whistling or hiss, stop and re-check seals. - 7
If airflow remains weak, investigate the motor bypass
Some vacuums have a bypass valve or secondary airflow path. If this is stuck open or closed, it can affect pressure. Consult the manual for bypass access and verify operation.
Tip: Do not force components; a stiff bypass may indicate internal damage. - 8
Document results and plan next steps
Record which components you cleaned or replaced and note results of the airflow test. If weak airflow persists, consider professional service or model-specific troubleshooting.
Tip: Keeping a maintenance log helps you quickly identify what fixes last longest.
FAQ
Why is my vacuum blowing air out of the exhaust instead of sucking properly?
This usually points to a blockage, a full bag, or a sealed leak in the airflow path. Start by checking the bag or bin, then clean or replace filters and inspect seals for gaps.
If your vacuum is blowing air instead of suction, check for blockages and clogged filters before inspecting seals.
Is it safe to take my vacuum apart to fix airflow problems?
Only if you unplug the unit and follow the manual’s disassembly steps. Avoid forcing parts; damaged components can create new hazards or reduce performance.
Yes, but unplug first and follow the manual to avoid injury.
Can a dirty filter cause weak suction?
Yes. A dirty or clogged filter restricts airflow, reducing suction. Replacing or cleaning it typically restores performance.
A dirty filter can cut suction; replace or clean it to restore airflow.
What should I do if airflow remains weak after cleaning?
If cleaning doesn’t help, the problem may be a more serious seal leak, motor issue, or bypass valve fault. Consult the manual or seek professional service.
If cleaning doesn’t fix it, consider professional service.
Will upgrading to new filters improve airflow long-term?
Upgrading to model-appropriate high-efficiency filters can improve airflow and filtration over time, especially for households with pets or allergies.
High-efficiency filters can help airflow and air quality.
How often should I perform a maintenance check on my vacuum?
Perform a quick check monthly and a thorough airflow maintenance every 3-6 months, depending on usage and dust exposure.
Do a quick monthly check and a deeper maintenance every few months.
Watch Video
The Essentials
- Inspect and replace clogged filters and bags.
- Check all seals and gaskets for leaks.
- Clear blockages in hoses and attachments.
- Test airflow after each maintenance step.
- Document maintenance for long-term airflow health.