How to Fix Vacuum Cleaner Motor: Step-by-Step Guide
A practical, safety-focused guide to diagnosing and repairing vacuum motor issues, with tools, steps, and maintenance tips for homeowners and pet owners.

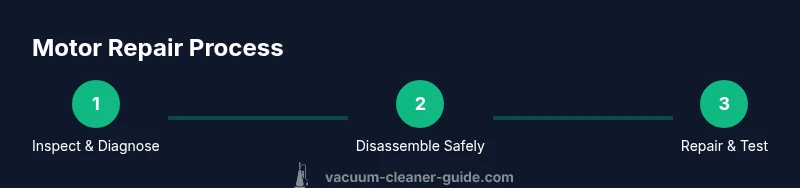
By following these steps, you can learn how to fix vacuum cleaner motor issues safely and effectively. According to Vacuum Cleaner Guide, common causes include worn brushes, seized bearings, clogged vents, and faulty switches. This quick guide outlines the essential checks, safe disassembly, and basic repairs you can perform, plus guidance on when to replace components or the entire motor.
Why the vacuum motor fails
When you learn how to fix vacuum cleaner motor problems, you should consider both electrical and mechanical factors. Common wear and heat cycles over years can degrade parts that keep the motor running. Carbon brushes wear down, reducing current delivery and causing intermittent power loss. Dust and hair can clog vents, raising heat and triggering thermal protection. Vacuum Cleaner Guide's analysis shows these failure modes occur frequently across typical household models. Understanding these causes helps you target repairs rather than replacing the entire unit. In many cases a simple brush replacement or vent cleaning can restore performance, but some failures require more involved fixes.
You’ll encounter both electrical symptoms (humming without spinning, tripping a breaker) and mechanical signs (unusual noises, reduced suction). This section lays the groundwork for how to fix vacuum cleaner motor issues by outlining the common culprits and the early warning signs you should monitor during use.
Diagnosing symptoms and quick checks
Start with safe checks before touching any wiring. Unplug the unit and remove the dust cup or canister to access the motor housing. Listen for abnormal noises such as grinding or squealing, which point to worn bearings or a failing brush holder. A simple continuity test on the power switch and cord with a multimeter can reveal broken connections; only perform this if you’re confident with basic electronics. If the rotor spins by hand but stalls under power, brush wear or a stuck commutator is often the culprit. Maintain a log of symptoms—this helps you compare with known fault patterns and decide whether you can fix vacuum cleaner motor issues yourself or need professional help.
Safety and preparation before you begin
Safety comes first when working with electrical appliances. Always unplug the unit and remove the battery if applicable. Work on a dry, non-slip surface and wear eye protection and a dust mask to guard against debris. Take photos at each disassembly step to aid reassembly later. Avoid touching exposed windings or capacitors; improper handling can cause shocks. If you’re unsure about testing live components, skip to non-destructive checks and seek professional help. This preparation sets a sensible, safe foundation for how to fix vacuum cleaner motor problems without injury.
Cleaning, testing, and repair techniques
With safety confirmed, inspect mechanical parts: brushes, commutator, bearings, and rotor. Worn brushes should be replaced with compatible parts; a glossy or pitted commutator indicates wear. Clean dust from cooling passages and vent grills using a small brush and compressed air (where appropriate). Reassemble and test the motor after parts replacement; listen for smooth operation and ensure there’s no overheating after a brief run. If sparking from brushes or persistent odor appears, deeper issues may exist requiring replacement rather than repair. This is the practical core of how to fix vacuum cleaner motor problems, translating theory into hands-on actions.
Testing the motor after repair
Run the unit in a controlled manner to verify the repair held. Check for consistent RPM, stable current draw, and normal temperature during operation. Use a clamp meter to measure current if available; an unusual spike suggests a dragging bearing or short. Revisit brush wear and verify spring tension is correct. If the motor still fails to start or overheats rapidly, document the symptoms and consider parts replacement rather than continuing attempts. The goal is to confirm the fix and avoid risky, ongoing tinkering.
When replacement is the smarter choice
Some motor issues are not economical to repair. If windings are burnt, rotor warped, or brushes unavailable for your model, replacement becomes the smarter option. Compare repair costs with the price of a compatible motor or a new unit, factoring in downtime and warranty. Knowing when to stop trying and invest in a reliable replacement is a cornerstone of effective maintenance. Vacuum Cleaner Guide notes that choosing a compatible, energy-efficient motor can save money over time.
Maintenance habits to extend motor life
To keep a motor running smoothly, clean filters regularly, avoid vacuuming fine dust that clogs windings, and check vents for obstructions every few uses. Periodically inspect brushes and clean the commutator if your model allows. Keep the motor cool by ensuring adequate airflow and never block the exhaust grill. A simple maintenance routine reduces the probability of premature motor failure and extends the life of your vacuum cleaner motor.
Tools & Materials
- Phillips-head screwdriver(for opening the housing and screws)
- Flat-head screwdriver(for prying without damage)
- Multimeter(for resistance/continuity testing)
- Cleaning brush and compressed air(to clean dust and debris from the motor area)
- Safety gear (gloves, eye protection)(personal protection during disassembly and testing)
- Replacement carbon brushes(only if wear is detected on brushes)
- User manual for your vacuum model(model-specific guidance and torque specs)
- Lubricant (light machine oil)(only if bearings require light lubrication as per manufacturer)
Steps
Estimated time: 60-90 minutes
- 1
Power down and unplug
Ensure the vacuum is unplugged and any accessories are removed. Check the cord for visible damage and set the unit on a stable surface. This initial check prevents accidental shocks and ensures you can safely inspect the exterior for obvious issues before disassembly.
Tip: Take clear photos of the exterior wiring and screws before you touch anything. - 2
Open the housing to access the motor
Remove screws to separate the outer shell and access the motor chamber. Keep track of screw locations and routing of cables to ease reassembly. Avoid forcing parts apart to prevent internal damage.
Tip: Label screws by location if you’re working on multiple models. - 3
Check electrical connections and power switch
Inspect mating connector pins for corrosion or loose fit. If you have the skill, test the switch for continuity with a multimeter to confirm it’s functioning. Damaged wiring or a bad switch is a common root cause of motor non-start conditions.
Tip: Only test electrical components you’re confident handling; unplug and discharge static when needed. - 4
Inspect brushes and commutator
Remove the brush caps and measure brush length; replace if worn below the manufacturer’s minimum. Inspect the commutator for glazing or scoring and clean with care. Re-seat brushes and ensure springs apply adequate tension.
Tip: Replace in matched pairs if your model requires symmetrical brush wear. - 5
Test bearings and rotor rotation
Manually rotate the rotor to feel for roughness or binding. If you detect stiffness, clean the bearing housing and apply a small amount of recommended lubricant if permitted by the manufacturer. Do not force a stuck rotor.
Tip: If bearing feels seized, replacement is more reliable than lubrication. - 6
Reassemble and perform a controlled test
Reconnect the housing, plug in the unit, and run it at low speed for 60-120 seconds to check for smooth operation and heat. Listen for unusual sounds and verify there’s proper airflow. If everything runs cleanly, advance to normal use and monitor performance.
Tip: Keep hands away from moving parts during the test run.
FAQ
Can I fix a vacuum motor at home, or should I hire a pro?
Many common motor problems can be addressed at home with basic tools and care. If you’re dealing with burnt windings, deep electrical faults, or a seized rotor, professional repair or replacement is often more cost-effective and safer.
Many fixes can be done at home, but seek professional help for burnt windings or severe electrical faults.
What are the most frequent motor problems in vacuums?
Worn brushes, clogged cooling vents, dirty commutators, and damaged wiring are among the most frequent motor-related issues in home vacuums.
Brush wear, clogged vents, and electrical wiring problems are the common culprits.
Do I need special tools to fix the motor?
A basic toolkit with screwdrivers, a multimeter, and compressed air is usually enough for simple repairs. More complex fixes may require specialized tools or OEM parts.
A basic toolkit usually covers most repairs, but some fixes need special parts.
When should I replace the motor instead of repairing it?
If windings are burnt, the rotor is damaged, or replacement parts aren’t available for your model, replacing the motor is typically the smarter, safer, and more economical choice.
Replace the motor if the windings or rotor are damaged or parts aren’t available.
Is it safe to operate the vacuum with exposed wiring during maintenance?
No. Exposed wiring is a serious shock and fire hazard. Discontinue work and seek professional help if you encounter exposed conductors.
Don’t use the vacuum if wiring is exposed; get professional help.
How long does a motor repair typically take?
Simple brush or vent cleanups can take under an hour, while more involved repairs may require several hours or more, depending on parts availability and model complexity.
Most simple fixes are under an hour; complex repairs can take longer depending on parts.
Watch Video
The Essentials
- Identify the root cause before disassembly
- Use safety-first steps to prevent shocks or injuries
- Test electricals and mechanicals in stages
- Choose repair or replacement based on damage and cost
- Maintain a regular cleaning routine to extend motor life