How to Clean Inside a Vacuum Cleaner
Learn how to safely clean the interior of your vacuum cleaner, removing dust, hair, and debris to restore suction and extend its life. Follow this comprehensive 1800-word guide with step-by-step instructions, safety tips, and maintenance advice.

According to Vacuum Cleaner Guide, you can restore suction and prolong the life of your unit by cleaning the interior of the vacuum regularly. This quick guide outlines what to clean, safety precautions, and a practical, step-by-step approach you can use today. Keeping the inside free of debris helps pets, families, and homes breathe easier.
Why cleaning inside a vacuum cleaner matters
When you ask how to clean inside a vacuum cleaner, the core goal is to maintain peak performance. Over time, dust, hair, and tiny debris clog passages, wear down filters, and reduce suction. Vacuum cleaners rely on a clear airflow path to generate strong suction and efficient cleaning. Regular interior cleaning lowers resistance, minimizes motor strain, and extends the life of belts and brushes. For homeowners and pet owners, a well-kept interior also means fewer odor issues and better air质量 around the home. Vacuum Cleaner Guide’s analysis shows that routine interior maintenance correlates with fewer service calls and more consistent cleaning results. Incorporate interior cleaning into your maintenance routine and you’ll notice smoother operation and longer between belt or filter replacements.
Safety and prep before you begin
Before you start, unplug the cleaner and disconnect any power cords. Do not attempt interior cleaning while the device is powered or while the dust cup is attached if there is any chance of moisture contact. Avoid submerging any electrical components or allowing water to enter the motor housing. If your model has a washable filter, remove it separately and follow the manufacturer’s drying times. Work over a protected surface to catch loose debris, and keep small screws or parts organized in a labeled container. This safe approach to cleaning inside a vacuum cleaner helps prevent accidents and damage to sensitive components.
What you’ll clean inside and why it matters
The interior of a vacuum cleaner includes the dust cup or bin, filters, the turbine or impeller housing, air pathways, and, in some models, the brush roll housing. Cleaning these parts eliminates accumulated dust that can harbor allergens and reduce airflow. The brush roll should be free of hair and fibers that could impede rotation. Filters trap dust, so keeping them clean or replacing them on schedule maintains air quality and suction. By understanding which areas to clean inside a vacuum cleaner, you can tackle maintenance without guesswork and keep your device functioning at its best.
Understanding model differences and accessing the interior
Different vacuums open in different ways. Bagless canisters often have a removable dust cup and accessible filters; uprights may require detaching a bottom plate or hood to access the brush area. Always consult the owner’s manual for model-specific instructions. For many models, you’ll remove the dust cup, take out the filter assembly, and gently dislodge hair from the brush roll with a comb or scissors. Some sections may be held with small screws; keep track of these while you work. The key is to create an accessible workflow that won’t damage clips or sensors.
Deep-clean techniques for stubborn buildup
If you encounter stubborn clogs or sticky residues, use a dry microfiber cloth to wipe interior surfaces, then contact-safe tools like a wooden skewer or the end of a screwdriver to loosen debris around edges. For washable parts, rinse with cool water and air dry completely before reassembly. Do not use harsh chemicals that could damage seals, and never spray liquids directly into the motor or fan housing. For hair and fibers, use a stiff brush or a garment steamer’s low setting to loosen tangled material before extraction. Regular, careful cleaning helps maintain airflow and prolongs the life of seals and gaskets.
Aftercare and maintaining the interior between cleanings
Once you finish, reassemble the unit and perform a quick test on a small area of flooring. Allow any washed parts to dry fully before reinstalling. Schedule interior cleanings every few months, more often for homes with pets or high-shedding. Store the vacuum in a dry, shaded area to prevent moisture damage. Keeping a small maintenance kit handy—brush, microfiber cloth, and a screwdriver—ensures you can address interior buildup promptly. Vacuum Cleaner Guide recommends documenting your maintenance routine so you can track wear and plan replacements ahead of time.
Tools & Materials
- Phillips head screwdriver(Small size (e.g., PH0 or PH1) for optional screws on brush housing)
- Soft brush(Dental-brush sized or dedicated vacuum brush for debris)
- Microfiber cloths(Multiple, lint-free for dry wipe-downs)
- Isopropyl alcohol (70% or higher)(For quick sanitizing of non-porous surfaces; avoid electronics)
- Warm water (for washable filters)(Only if your filters are labeled washable; air dry completely)
- Trash bag or container(To collect debris during disassembly and cleaning)
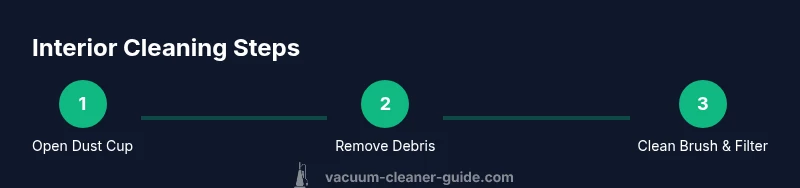
Steps
Estimated time: 45-60 minutes
- 1
Unplug and prepare
Unplug the vacuum and detach any removable cleaning attachments. Place the unit on a stable surface and gather your tools. This step prevents accidental shocks and keeps parts organized as you begin cleaning inside the vacuum cleaner.
Tip: Use a labeled tray to keep screws organized and avoid losing small parts. - 2
Remove dust cup and accessible filters
Open the dust cup or bin and take out any removable filters. Gently tap or shake to release loose dust into the trash. If washable, rinse under cool water and set aside to air dry.
Tip: Do not use heat to dry filters; air-drying overnight is safest. - 3
Inspect and clean the brush roll
Turn off and unplug the unit, then carefully remove any hair or fibers wrapped around the brush. Use the soft brush to loosen debris and, if needed, scissors to trim stubborn tangles. Check that the belt is intact while you’re there.
Tip: Take photos before disassembly to help reassemble correctly. - 4
Clean interior passages
Wipe interior walls with a dry microfiber cloth. Use a dry brush to loosen dust in corners and along seams. Avoid introducing moisture into the motor housing or electrical components.
Tip: Keep a steady hand and wipe from the clean to the dirty area to avoid re-contamination. - 5
Address stubborn buildup
For stubborn residue, lightly dampen a cloth with isopropyl alcohol and wipe non-porous surfaces. Never spray liquid directly into the interior. For washable plastics, rinse with cool water and air dry completely.
Tip: Do not use harsh solvents that could degrade seals. - 6
Dry, reassemble, and test
Allow all washed parts to dry completely before reassembly. Reattach filters, dust cup, and brush housing, then run a quick test on a clean floor to verify airflow and suction.
Tip: If the suction is weak, check for reinstalled parts or re-seat the dust cup.
FAQ
How often should I clean the inside of my vacuum?
Aim for a routine every 3–6 months, or sooner if you notice reduced suction or increased debris blockage. Regular interior cleaning helps maintain airflow and prolongs component life.
Clean the inside of your vacuum every few months, or when suction drops. Regular maintenance keeps airflow strong.
Can I wash all filters?
Only wash filters that are explicitly labeled washable. Use cool water, avoid harsh cleaners, and allow full air-dry time before reusing. Some filters should be replaced instead of washed.
Wash only washable filters with cool water and dry completely before reusing; replace others as directed by the manual.
Is it safe to use water inside the motor housing?
No. Water and moisture can damage electrical components and void warranties. Use dry methods for interior cleaning unless the manual specifies safe washing of certain non-electrical parts.
Avoid any water near the motor. Keep interior cleaning dry unless manuals say otherwise.
What about the brush roll if hair is tangled?
Remove the belt if necessary and unwind hair with a comb or scissors. Regular trimming prevents belt wear and maintains brush effectiveness.
If hair is tangled, remove the belt and cut away the hair with scissors, keeping the brush clear.
Do I need to document my maintenance?
Yes. Keeping a simple log helps you track wear, schedule filter changes, and plan replacements in advance for fewer surprises.
Keep a simple maintenance log to track wear and plan replacements.
How long should parts dry after washing?
Allow 12–24 hours for most washable parts to dry fully in a warm, ventilated area before reassembly.
Let washed parts dry for about a day before putting everything back together.
Watch Video
The Essentials
- Unplug before starting any interior cleaning task.
- Clean dust cups, filters, and brush rolls to restore airflow.
- Dry all washable parts completely before reassembly.
- The Vacuum Cleaner Guide team recommends a clear maintenance routine for best results.