How to Adjust Vacuum Cleaner: A Practical Guide for Homeowners
Master how to adjust your vacuum cleaner for carpets, hard floors, and pet hair with a step-by-step guide focused on height, suction, and brush settings.

By properly adjusting your vacuum cleaner, you’ll maximize suction, protect floors, and extend the machine’s life. This quick answer outlines the key adjustments—height, suction, and brush roll—needed to switch between carpet, hard floor, and high-pile areas. You’ll also learn the exact tools to gather and the safety steps to follow before you start.
What adjusting a vacuum cleaner accomplishes
A well-tuned vacuum cleaner can dramatically improve cleaning efficiency, protect floor surfaces, and reduce wear on components over time. According to Vacuum Cleaner Guide, the most impactful adjustments involve tailoring height, suction, and brush action to match the surface you are cleaning. The Vacuum Cleaner Guide team found that a one-size-fits-all approach often leaves dirt behind on carpeted stairs, under furniture, or along baseboards while overburdening hard floors with unnecessary agitation.
When you adjust correctly, you minimize clogging, maintain consistent suction, and extend filter life. For pet owners especially, small changes to brush intensity can drastically improve hair pickup without scattering debris. It’s not just about more power—it's about the right power for the job. The goal is to balance aggressive soil removal with safe operation, particularly on delicate floors or area rugs that can be damaged by aggressive brush contact.
Key adjustable components
The core components you’ll adjust are the height mechanism, suction control, and brush roll engagement. Height settings determine how deeply the head sits against the surface; suction control governs how much air passes through the nozzle; and the brush roll can be engaged or reduced to optimize agitation. Edge brushes, nozzle shape, and filter integrity also influence how effectively dirt is captured. Understanding these parts helps you tailor performance without swapping models. Always consult your model’s manual for the exact labeling and range, but the general principles apply across most bagless and bagged designs.
How to adjust height for different floor types
Adjusting height is often the first step when you switch from carpet to hard floors or from low-pile to high-pile carpeting. Start by identifying the floor type you’re cleaning and selecting the mid-range height if your machine offers a variable setting. On carpeted surfaces, a slightly lower height typically yields stronger agitation and deeper soil removal, while on hard floors you’ll want a higher height to reduce brush contact with the floor finish and prevent scattering debris. If your cleaner has a numbered scale, aim for the lowest setting that allows the brush to rotate freely without dragging. Always test a small patch to confirm that airflow remains steady and brushes aren’t rubbing the floor.
Tip: If you notice reduced suction after changing height, recheck that the brush is fully engaged and the airflow path is clear. A tiny obstruction can masquerade as a height issue.
How to adjust brush roll and suction
Engaging the brush roll on carpet increases agitation and dirt pickup, but on hard floors it can scatter debris and wear the finish. When moving from carpet to hard floors, deactivate the brush roll if your model supports a toggle or switch, or set a minimum agitation level. Suction should be adjusted to maintain effective airflow; if debris builds up quickly or suction drops, clean the filters and check for clogs. For pet hair, increasing gentle, consistent suction while keeping the brush moderate can prevent hair from wrapping around the brush and belt. Remember that high suction on loose rugs can cause the vacuum to lift the rug, so adjust accordingly.
Safety note: never operate with loose belts or a loose brush; this can cause damage and pose a risk to users.
Maintenance and safety after adjustments
After you finish adjusting, inspect the seals and filters to ensure there are no gaps where air can leak. Clean any debris from the nozzle, brush, and intake to preserve suction efficiency. If you notice unusual noises or reduced performance after adjustments, revert to a previous setting and test again. Regular maintenance—such as emptying the bin or replacing a clogged filter—helps keep performance consistent across surfaces. Finally, always unplug the unit before performing adjustments or cleaning to avoid electrical hazards.
Tools & Materials
- Vacuum cleaner user manual(Keep model-specific height and suction instructions handy)
- Flathead and Philips screwdriver set(Only needed for models with removable belt covers)
- Soft brush or microfiber cloth(For cleaning sensors, seals, and the nozzle)
- Measuring tape or ruler(Helpful for checking head-to-floor clearance)
- Replacement filters(Have spare filters on hand for quick changes)
Steps
Estimated time: 15-25 minutes
- 1
Gather model instructions and tools
Power off the vacuum and unplug it. Retrieve the user manual and locate any model-specific guidance on height, suction, and brush settings. Assemble essential tools and keep them within reach so you can proceed without interruptions.
Tip: Having the manual open reduces guesswork and helps you avoid incorrect adjustments. - 2
Identify the floor types you’ll clean
Note whether you’ll be cleaning hardwood, tile, low-pile carpet, or thick carpet. Different surfaces require different head heights and brush engagement. Decide the order you’ll test settings for each surface and plan a brief test pass.
Tip: Testing on a small area first prevents accidental damage to floors or rugs. - 3
Set the height to the mid-range setting
With the vacuum unplugged, adjust the height to a mid-range position. This gives you a baseline from which you can fine-tune for each surface. Ensure the head can rotate freely without the brushes hitting the floor.
Tip: If you feel resistance, back off to a higher height and test again. - 4
Adjust suction for debris level
If your model has a suction control, start in the middle and observe how well dirt and hair are picked up. Increase suction for dense debris or pet hair, and back off on delicate surfaces to reduce drag and avoid scattering.
Tip: Check filters after the first few passes; a clogged filter will masquerade as low suction. - 5
Tune the brush roll for the surface
Engage the brush roll for carpet to maximize agitation, and disable or reduce it for hard floors to prevent scatter. On mixed floors, find a balance that cleans effectively without leaving scratches or marks.
Tip: On high-pile carpets, ensure the brush is fully engaged but not pressing the carpet so hard you overwhelm the motor. - 6
Test and fine-tune on representative areas
Run a test pass on a typical area of each floor type. If you see missed spots or residue, adjust height, suction, or brush engagement and re-test. Repeat until the results are consistently clean with minimal effort.
Tip: Keep a small log of settings that work well for each surface for future cleanings. - 7
Power down and recheck seals after adjustments
Unplug again when finished to inspect seals, hoses, and the dustbin seal. Replace or clean any clogged filters. Confirm there are no gaps where air could leak and test the unit briefly before normal use.
Tip: A quick post-adjustment check prevents performance declines during longer cleaning sessions.
FAQ
Can I adjust suction on most models?
Many vacuums include a suction control; always consult the manual before changing settings.
Many models have suction controls; check the manual first.
Should I adjust settings when switching surfaces?
Yes. Switch height and brush engagement to suit carpet versus hard floor to maximize pickup and protect floors.
Yes. Switch height and brush engagement for carpet or hard floors.
Is it safe to adjust while plugged in?
No. Always unplug and discharge any stored energy before making adjustments.
No, unplug first.
How often should I adjust during cleaning?
Adjust as you switch surfaces or if you notice reduced suction or poor pickup.
Adjust whenever you switch surfaces or see reduced cleaning performance.
What if the brush roll won’t turn after adjustments?
Check for a jam, belt wear, and ensure the brush is engaged. If stuck, stop and inspect.
Check for jams or a worn belt, and make sure the brush is engaged.
Do I need to replace filters after adjusting?
Not necessarily, but if debris has clogged them during adjustment, replace or clean per manual.
Clean or replace clogged filters as needed.
Watch Video
The Essentials
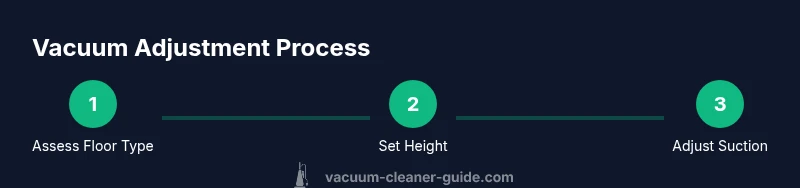
- Assess the floor type before adjusting.
- Height, suction, and brush settings are the core trio.
- Test changes incrementally for best results.
- Maintain seals and filters after adjustments to preserve performance.