Eureka Vacuum Cleaner Parts: Replacement Guide and Compatibility
Learn how to identify and replace Eureka vacuum cleaner parts—belts, brushes, filters, and bags. This guide covers model compatibility, genuine vs aftermarket options, and safe replacement steps for homeowners and pet owners.

According to Vacuum Cleaner Guide, Eureka vacuum cleaner parts span belts, brushes, filters, bags, motors, and housings. This guide helps homeowners identify model-specific components, source genuine versus aftermarket replacements, and evaluate compatibility. You'll learn how to read part numbers, compare parts across popular Eureka series, and perform safe, in-step replacements to restore suction and maximize lifespan.
Overview of Eureka Parts and How They Fit Your Home
Eureka vacuum cleaner parts are built to perform a range of tasks—from scraping deep piles to capturing fine pet dander. This section describes the core components that commonly appear across Eureka models, including belts, brush rolls, filters, bags, gaskets, and motors. Understanding what each part does helps homeowners diagnose performance issues and plan replacements before breakdowns. In particular, belts drive the brush and suction, while brush rolls agitate carpet fibers to lift embedded debris. Filters trap dust and allergens, while bags collect waste in bagged models. Some models mix bagless configurations offering canisters or dust cups. Recognize that the exact part arrangement varies by series and model year; for example, oblong belt paths on older models may differ from newer, low-profile designs. The broad family of Eureka parts is designed to be serviceable, with common wear points repeated across multiple versions. According to Vacuum Cleaner Guide, these parts are the most frequently serviced.
Reading Model Numbers: Compatibility Matters
To identify the correct eureka vacuum cleaner parts, start with the model number and series. Look for a tag on the body, the user manual, or the original box. Many parts are specific to a model year or series, so cross-check the part number with official catalogs or reputable retailers. If you cannot locate a part number, use descriptive features such as belt width, brush type, and housing shape to search, but always confirm compatibility before purchase. Keep a simple log of your model details and the parts you’ve replaced; this helps with future maintenance and warranty concerns.
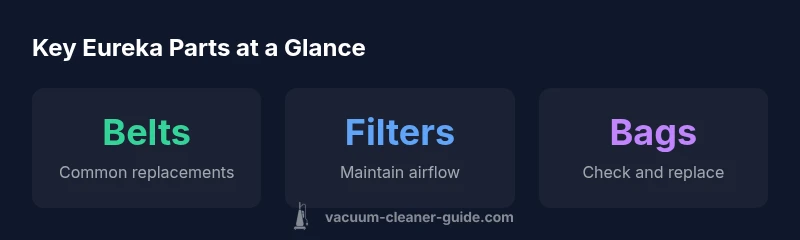
Belts, Brushes, and Suction Components
Belts drive the brush and suction pathways; when a belt stretches, cracks, or slips, suction drops and the brush may stop rotating. Brush rolls wear down and shed bristles, reducing pickup efficiency. Some Eureka models use paired belts or idlers that change tension as you operate. Regular inspection of the brush and belt path can prevent debris buildup and preserve suction power. If you hear squealing or notice reduced performance after a load, inspect these components first. In many cases, replacement is straightforward and can restore performance without specialized tools. Always power off, unplug, and follow model-specific instructions when removing covers. This is a good opportunity to clean hair and dust from the belt area to extend life.
Filters, Bags, and Seals
Filters and bags are the frontline defense against dust and allergens; clogged filters or full bags reduce airflow and lower suction. Check your Eureka vacuum cleaner parts inventory for the correct filter type—pre-motor, post-motor, or HEPA compatible. Bagged models require regular bag changes to maintain efficiency; bagless designs rely on canisters that should be emptied and cleaned routinely. Don’t forget seals and gaskets; worn seals can cause air leaks that bypass filters and degrade performance. A quick maintenance habit is to check these components every 1-3 months depending on usage, and replace when you notice visible wear, a musty odor, or reduced suction.
Motors and Housings: When to Replace
The motor is the heart of any vacuum, and Eureka parts sometimes include motor housings rather than complete motors in smaller repairs. If you notice loud grinding, overheating, or smoke, stop operation immediately and inspect for obstruction or worn bearings. Depending on the model, motor replacement may require professional service, but many early-stage issues can be addressed by cleaning and replacing the surrounding components, such as bushings or seals. Before replacing, confirm the motor’s compatibility with your model and verify the warranty implications. Regular maintenance, including keeping the intake clean and avoiding obstructed hoses, helps prevent premature motor wear.
Genuine vs aftermarket Parts: Pros and Cons
Genuine Eureka parts are designed to fit precisely and maintain warranty protections, but they may cost more than aftermarket options. Aftermarket components can be cheaper and readily available, but the risk of mismatches, reduced performance, or shorter lifespans is higher if you don’t verify compatibility. The best approach is to compare part numbers, read user reviews, and rely on reputable sellers with clear compatibility information. If your warranty is a priority, favor genuine parts or consult the manufacturer before purchasing aftermarket replacement parts. This decision directly affects how 'eureka vacuum cleaner parts' function across your home.
Sourcing Parts: Where to Buy and How to Verify
Reliable sources for Eureka parts include authorized retailers, the official Eureka website or catalog, and established repair shops. When shopping, verify the seller’s return policy, ensure the part number matches your model, and check for included documentation like installation guides. Avoid low-cost listings with vague descriptions or unknown brands. Keep a record of receipts and model numbers for future maintenance, and consider subscribing to retailer newsletters for price alerts and promotions. This disciplined sourcing reduces the risk of counterfeit or incompatible parts.
Safe Replacement Steps: A Practical How-To
Before you begin, unplug the vacuum and remove the canister or bag if applicable. Use the model’s manual to locate the replacement part, then carefully disengage fasteners, note how components align, and replace with the matching Eureka parts. Clean the area around the replacement site to prevent dust re-entry, reassemble in the correct order, and test the vacuum at low power before full operation. If any sounds or smells persist, stop and re-check the installation. Keeping a basic toolkit and a magnifier for part numbers makes the process smoother.
Maintenance Habits to Extend Part Life
Develop a simple routine that includes monthly visual checks of belts and brushes, quarterly filter changes, and annual professional service if you have a heavily used unit. Create a short checklist that you keep near your vacuum so you remember to inspect the seals, hoses, and attachments. Storing the vacuum in a clean, dry place helps prevent rust and corrosion that can affect motor performance. By treating your eureka vacuum cleaner parts well, you’ll maintain strong suction and prolong the life of your machine, with fewer unexpected outages.
Overview of common Eureka replacement parts
| Part Type | Notes | Replacement Guidance |
|---|---|---|
| Belts | Crack or stretch indicates replacement | Check compatibility with model numbers and replace per manufacturer guidance |
| Brushes | Wear reduces performance | Replace when bristles wear or hair tangles impair pickup |
FAQ
What are the most commonly replaced Eureka parts?
Belts, brushes, filters, and bags are the parts you’ll replace most often due to wear or clogging. Regular checks help prevent performance dips and expensive repairs.
Belts, brushes, filters, and bags are the most commonly replaced parts you’ll encounter.
How do I identify the correct Eureka part for my model?
Check the model number, series, and the part number from the manual or label on the unit. Cross-check with official catalogs or reputable retailers to ensure compatibility before purchasing.
Find your model number, match it to the part number, and double-check with the retailer.
Are aftermarket Eureka parts safe for warranties?
Aftermarket parts can be cheaper, but they may affect warranties if not verified with the manufacturer. When in doubt, opt for genuine parts or confirm compatibility first.
Be careful with aftermarket parts—check your warranty before buying.
Where can I buy Eureka parts?
Purchase from authorized retailers, the official Eureka site, or reputable repair shops. Avoid unknown sellers with vague listings to reduce the risk of counterfeit parts.
Buy from trusted retailers or the official site to avoid counterfeit parts.
Do Eureka parts interchange across generations?
Some parts interchange across generations, but many are model-specific. Always verify part numbers and consult the seller or manual before buying.
Some parts cross generations, but always confirm compatibility.
What maintenance steps reduce frequent replacements?
Regular cleaning, timely replacement of worn parts, and proper storage can significantly extend part life. Follow a simple schedule to catch issues early.
Keep a routine: clean, check, and replace worn parts on time.
“Clear, model-specific guidance helps homeowners avoid costly mis-matches and suboptimal repairs.”
The Essentials
- Identify compatible Eureka parts by model first
- Prefer genuine parts to protect warranties
- Check part numbers before purchasing
- Regular cleaning extends part life
- Know where to source parts from trusted retailers